")

")

When working with projects that need to withstand extremely high temperatures (up to 1200°C), whether it’s an outdoor pizza oven, a flue pipe, or even an industrial furnace, you’ll come across a specialised material called fire cement. Also referred to as heat-resistant cement or refractory cement, this substance is specifically designed to resist intense heat and maintain structural stability in high-temperature environments.
But on its own, fire cement can be too dense or brittle for certain high heat applications. That’s why understanding how to mix fire cement with other materials is essential if you want to create a durable, heat-resistant structure. Done correctly, mixing enhances thermal insulation, improves energy efficiency, and ensures optimal adhesion (if mixed correctly) between fire bricks, clay, or flue pipes. Done poorly, it can lead to cracks, loss of fire resistance, or even dangerous failures when exposed to extreme heat.
This guide explains the properties of fire cement, outlines the materials and tools you’ll need, and provides a step-by-step process for creating mixtures that can withstand extreme temperatures without compromising safety or performance.
Understanding Fire Cement and Its Properties
Fire cement isn’t just another form of cement. Unlike regular cement, which struggles in high-temperature applications, fire cement is made from refractory materials such as fire clay and calcium oxide. These components give it the ability to resist thermal shock and rapid temperature changes while maintaining structural integrity.
This type of cement is specifically designed for areas exposed to extreme temperatures, such as fireplaces, furnaces, and pizza ovens. Its heat resistance makes it ideal for sealing joints around a flue pipe or binding fire bricks together. In these harsh conditions, regular mortars would crumble or lose their strength, but fire cement continues to hold its form and function.
However, fire cement on its own is not always enough. While it provides excellent fire resistance, it can be improved by combining it with other common materials like sand, clay, or perlite. These mixtures allow you to fine-tune properties such as thermal insulation, energy efficiency, and structural stability, depending on the various applications.
Before you start, it’s important to take safety precautions. Mixing cement creates dust that can irritate lungs, and handling the raw materials requires gloves to avoid skin contact. A little careful preparation at this stage ensures both safety and optimal results later.
Essential Materials and Tools
To learn how to mix fire cement effectively, you’ll first need the right ingredients. Fire cement is usually combined with other refractory materials to boost its performance:
- Fire clay – improves thermal insulation and allows the mix to cope with extremely high temperatures.
- Sand – adds bulk and improves workability without compromising heat resistance.
- Perlite – a lightweight aggregate that enhances energy efficiency (by reducing heat loss) and offers excellent insulation in high-temperature environments.
- Fire bricks – commonly paired with fire cement mortar to build pizza ovens, fireplaces, or furnaces.
When preparing your mixture, you’ll also need reliable tools. A sturdy plastic mixing bucket, a trowel, and a mixing paddle will help combine dry ingredients thoroughly before adding water. Protective equipment is equally essential: wear gloves, a dust mask, and ensure good ventilation to avoid breathing in fine dust.
Surface preparation is just as important as the mix itself. For optimal adhesion, make sure all bricks or surfaces are free from grease, smoke residue, or moisture. Even small amounts can weaken the bond and affect the long-term structural stability of your project.
With the right materials and tools on hand, you’re ready to start creating durable, heat-resistant mixtures that will cure properly and withstand extreme heat in a range of high heat applications.
Step-by-Step Guide – How to Mix Fire Cement
Mixing fire cement with other refractory materials isn’t complicated, but it does require careful preparation. To maintain fire resistance and ensure the mixture can withstand extreme temperatures, each step must be followed with precision. Here’s how to do it.
Step 1: Prepare Your Workspace
Choose a well-ventilated, cool area for mixing. Lay down plastic sheeting to protect surfaces from cement dust and splashes. Make sure your tools and mixing bucket are clean and grease-free, as even a thin layer of grease or moisture can stop the mixture from bonding properly. Put on gloves, a dust mask, and safety glasses before handling any dry ingredients.
Step 2: Measure Ingredients Accurately
The strength and heat resistance of your mix depend on the ratios. A good home brew mix for general high heat applications is:
- 1 part fire cement
- 1 part fire clay
- 2–3 parts sand
- 1 part perlite
This combination creates a balance of thermal insulation, structural stability, and exceptional adhesion. If you’re building a pizza oven, you may want more perlite for excellent insulation. For a furnace or flue pipe, lean towards more sand for strength under intense heat.
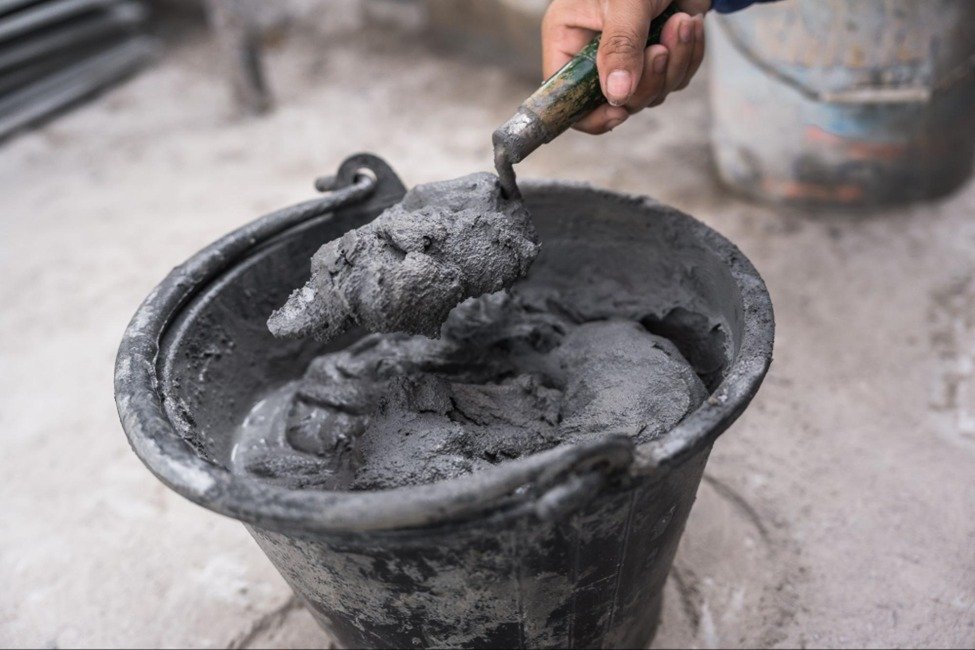
Step 3: Mix Dry Ingredients Thoroughly
Combine all the dry ingredients in a bucket or on a flat surface. Take time to ensure the mixture is even, with no clumps of clay or pockets of sand. This step is essential for creating durable joints and preventing weak spots when the structure faces extreme temperatures.
Step 4: Add Water Gradually
Pour in a small amount of water and mix continuously. The aim is a thick, mortar-like consistency – not too wet, not too dry. If the mix is too runny, it won’t cure properly and will crack when exposed to high temperatures. If it’s too dry, it won’t adhere to bricks or other surfaces. Add water slowly until the mix is workable but still firm.
Step 5: Apply the Mix
Spread the mortar onto fire bricks, around a flue pipe, or into the joints of a pizza oven. Use a trowel to press it firmly, making sure it fills every gap for optimal adhesion and structural integrity. Work efficiently – once the mix starts to set, it loses its ability to bond.
Step 6: Curing the Mixture
Perhaps the most important stage is curing. Allow the cement to cure properly in a dry environment before exposing it to heat. Once it’s hardened, introduce heat gradually. Start with small fires or low temperatures in fireplaces or pizza ovens, then increase slowly. This prevents thermal shock, avoids cracks, and ensures full curing. Only after this stage will your structure be ready to handle extremely high temperatures safely.
Best Practices and Safety Precautions
Even with the correct mixture, your work can fail if you overlook the small details. To get the best results, keep these practices in mind:
- Cure properly before use: Resist the temptation to light a full fire straight away. The cement must harden and dry naturally before facing intense heat. Skipping this step risks cracks and reduced fire resistance.
- Gradually heat during first use: When using your pizza oven, fireplace, or furnace for the first time, always start with a small, low fire. This allows the structure to adjust without thermal shock. Jumping straight to extremely high temperatures can cause sudden cracks.
- Never substitute with regular cement: Regular cement lacks the ability to cope with extreme temperatures. It will crumble, smoke, or lose strength under high heat applications, compromising both safety and structural integrity.
- Keep surfaces clean: Before applying, remove all dust, grease, smoke residue, or plastic debris from surfaces. This step is essential to ensure optimal adhesion.
- Wear protective gear: Gloves, dust masks, and good ventilation protect you from irritation caused by cement dust. A little caution during mixing goes a long way to ensure safety in the long term.
By following these precautions, you not only create a structure that can withstand harsh conditions but also improve its energy efficiency and durability.
Troubleshooting and Common Mistakes
Even with the right recipe, mistakes happen. Here are the most frequent problems and how to avoid them:
- Mixture too wet: Over-adding water weakens the mortar. The mix may seem easy to spread, but once dry, it will crack under extreme heat. Aim for a thick consistency instead.
- Incomplete curing: Rushing to fire up your oven or furnace before the mortar has hardened leads to reduced heat resistance. Always allow for full curing and then gradually heat.
- Wrong ratios: Using too much sand or too little fire clay reduces the ability to withstand high temperatures. Stick to tested ratios unless you’re adapting for a specific industrial application.
- Using the wrong type of sand or clay: Ordinary materials may contain impurities that reduce high-temperature resistance. Always source refractory materials designed for high heat applications.
- Poor surface preparation: Applying mortar to wet or greasy surfaces stops it from bonding. Dry, clean surfaces are essential for exceptional adhesion and structural stability.
By avoiding these errors, you’ll extend the life of your structure and maintain both safety and heat resistance.
Conclusion
Learning how to mix fire cement correctly is vital for anyone working on projects exposed to extremely high temperatures (up to 1000–1200°C). When blended with fire clay, sand, and perlite, this heat-resistant cement transforms into a durable, heat-resistant mortar that offers both excellent insulation and structural stability.
The key is in the details: accurate ratios, careful preparation, slow curing, and the discipline to gradually heat the structure before subjecting it to intense heat. With these steps, you’ll achieve optimal results – whether you’re sealing a flue pipe, building a pizza oven, or working on industrial applications.
By respecting the properties of refractory cement and following safety precautions, you ensure your build not only survives harsh conditions, but thrives under them. Done right, the result is a structure that can withstand extreme temperatures with confidence, delivering both reliability and long-term energy efficiency. Just remember that periodic inspection and possible filling of defects (e.g. with ready-made refractory material) is part of the maintenance of ovens and fireplaces.
READ ALSO: 7 Construction Scheduling Mistakes and How to Avoid Them